Adam and Don installed polyurethaned tongue-and-groove boards in the foyer (6” width boards here), the master bedroom and were working on the cathedral ceiling above the dining/living rooms when I left them this afternoon (Wednesday).
Their application speed is far outstripping the speed with which boards can be prepared. Preparation requires four steps: 1- sanding, 2- application of first coat and at least one day of drying, 3- light sanding of dried first coat, and 4- application of a second coat and at least one day of drying. As you can see, it takes at least two days to prepare a board for installation. We can do about 40 boards at a time. Don and Adam can apply 40 boards in about a day. They have almost caught up to the stack of prepared boards. Luckily, they can move over to sheetrocking the walls for a day or two to give those polyurethaning the boards a chance to gain ground.
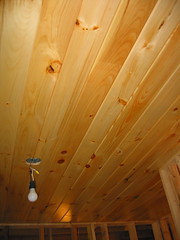
The foyer ceiling. So far, it’s the only ceiling composed of 1x6 boards.
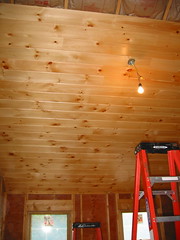
Half of the master bedroom ceiling.
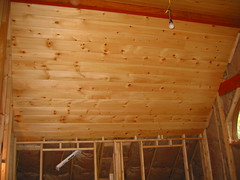
The other half of the master bedroom ceiling.
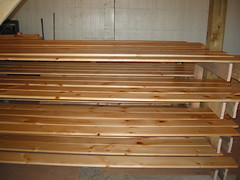
A full drying rack. This is only the first coat on these boards. They’ll need a sanding and second coat before they’re ready to be installed.
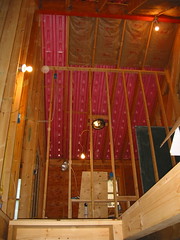
This is one of several walls that awaits sheetrock. (Also note some ceiling still needs insulation. The pink stuff is the styrafoam eave vent.)
1 comment:
Really taking shape. What product(s) are you using for interior/exterior? Colored or transparent? Penetrating or top coat?
Post a Comment