Having gotten all the materials I thought I would also pick up some furring strips so I would have a bit more leeway as to where I needed to put the lag screws that would attach the grid to the floor joists. So Saturday, after the bird walk at Hills Creek State Park, I stopped at the building supply company in Mansfield to get 32 of the 8’ long furring strips.
Here’s all the stuff stacked up in the basement.

The basement is really divided in two halves by the main support beam that runs down the middle. Each half is approximately 13’ wide and 25’ long. The west side is the easiest as there are no real fancy details to worry about. The east side, however has several zigs and zags and areas that need to be built up or around.
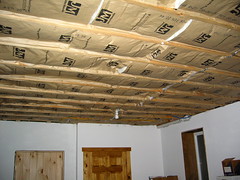
West half of the basement. Note the small bump out that occurs between the two doors. That, and a similar bump out on the other end, is the only thing that prevents this from being a real rectangle.
There are two light fixtures in each half. Both fixtures on the west side will be replaced with recessed lighting. (Shoot! I forgot to buy the cans for that!)
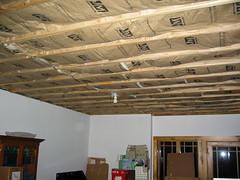
The west side from the opposite end.
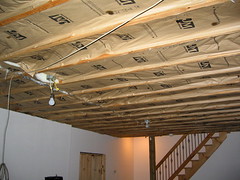
The east side of the basement. This side is a different story. The stretch along the stairwell will require a board be hung so the wall trim (which holds the tiles and the grid in place) will have something to which it can be attached. Also, a smoke detector and an alarm sensor will have to be relocated.
On the other end of the east side…
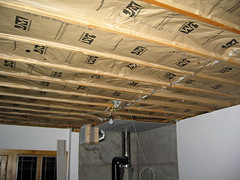
The light nearest the fireplace will be replaced with a ceiling fan. Being quite heavy, some imaginative thinking will be required to figure out how to hang the fixture. (The floor joists are 8’ 9” off the basement floor. Dropping the ceiling 5” will still leave plenty of headroom even with a fan in this location.) Another problem is the rock board that acts as a fire proof ceiling over the wood burner drops down from the floor joists about 3”.
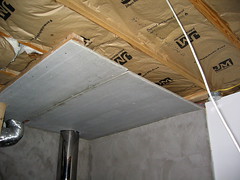
Fire proof ceiling is a requirement.
It will have to be boxed in but…
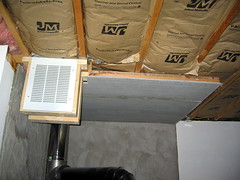
There is also an air filter/intake for the living room fireplace mounted here. This circulates air to the jacket of the fireplace and heats it before blowing it into the room. It will need to be boxed in but with room left for free air circulation.
So that’s what my week holds for me. I expect to have all the boxing in done and the furring strips hung by tomorrow evening. If all goes well. Once that’s done, the rest should be a snap.
Except for all that shifting about of the electrical stuff. But that has to wait for the grid to be in place so the fixtures end up where they should…in the center of a tile instead of where they shouldn’t like right over a a grid line.
2 comments:
Sounds like you have your work cut out for you. I'll take my building of a storage shed over suspended ceiling any day.
Good Job!:)
Post a Comment