Let me walk you through the project as it stands right now. We had need for a twenty foot long retaining wall that would separate the yard area under the deck from the driveway. The driveway and the main entrance to the house are some 6 to 7 feet above the ground area that we walk out on as we exit the basement. By putting the retaining wall in, we would have a relatively flat area adjacent to the driveway and right in front of the front door that could be used for plantings. The wall would also stop the erosion from the current bank
We looked around at different products and decided to go with a concrete block from Versa-Lok.
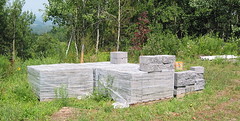
There are three pallets of full size blocks. (Each block weighs 85 pounds.) The fourth pallet contains half blocks and the cap blocks.
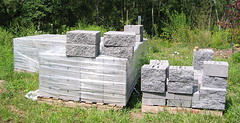
We chose Versa-Lok because it uses solid concrete block held together by pegs. There's no need to fill any voids as you go along and there's no mortar to mix and apply. If, somewhere down the road, we don't like the look, we can simply (HA!) take the wall apart one block at a time.
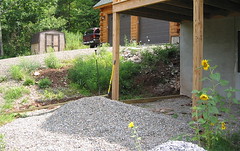
The supplier delivered the Versa-Lok blocks, a couple of ton of stone and one ton of crushed aggregate on August 2nd.
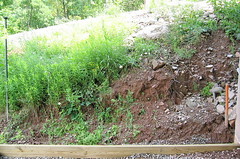
String (for a straight line), pressure treated 2x6 (for retaining the compactible crushed stone base), a heavy bar to break up the stony soil, some hand tools (shovel and rake) and the ability and will to apply lots of muscle are all it took to get started.
We started Wednesday, August 8, by digging out a trench where the wall was going to be. Actually, since the bank was there, we only needed to support one side of the trench with 2x6 pressure treated lumber. We filled that trench with the crushed aggregate and Terry compacted it with a large wooden tamper. As she compacted the stone, she also made sure the surface was level. That is most important because if the first row of block isn’t level and straight then the entire wall will be unstable. We took our time making sure the first row was right.
Once the base was compacted and level, I hauled the block over and we laid the first row down. Each block is 16” long, 12” deep and 8” high. Did I mention that each one weighs 85 pounds? The second row began with a half block so the vertical joints would be staggered. The second row, and each successive one, sits back about ¾ of an inch so the wall actually leans into the bank. Each block is held in place with four plastic pegs that are driven through holes in the concrete and wedge into grooves in the block below. With two rows in place, I placed the PVC drain pipe in the trench behind the wall and made sure it slanted the way I wanted the water to flow. I then shoveled gravel over, under and around it to keep it in place.
We finished up on Wednesday with just two rows of block in place but felt we had made a good beginning. We went birding on Thursday morning and got back to work that afternoon, laying three more rows of block and putting stone behind to bring the gravel level to the top of the five rows we now had in place.
Friday was a cold, wet, foggy day so I gave my back a rest.
Saturday morning I laid the plastic mesh atop the gravel and row five before putting row six in place. The mesh is supposed to tie the wall into the gravel/soil behind it making it more difficult for the wall to come tumbling down. (But at 85 pounds each and leaning into the bank, that’s unlikely except for the tallest of walls.)
When I had row six in place, I shoveled more gravel on top of the mesh. Just a few inches however, as we will be putting soil in on top of that so we can have some plants to landscape the entranceway. Because of the slanted nature of the driveway, row six was two blocks shorter than the previous five, In fact, with every additional row, there would be fewer blocks needed as I stepped the top of the wall upward toward the front door.
It’s a good thing, too. Row six was already 48 inches above the ground (8” per row) and it was going to get more and more difficult to get the full sized blocks to the top of the wall. By the time I got the last row (number 10) in place, I felt like I was competing for “The World’s Strongest Man”. You might have seen it. The pull tractor trailers and lift incredible weights of unusual shapes and sizes. In one event they have to lift huge, round stones and place them on pedestals. Each pedestal is higher than the last and they have to lift five stones in place. Well, that’s what it felt like to me as I lifted those 85 pound blocks higher and higher.
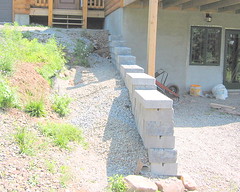
Anyway, here are a few shots of the nearly finished wall.
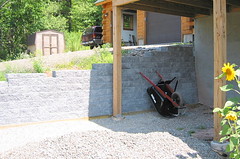
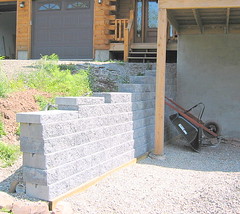
In this shot, you can see how the wall leans into the hill. (Or it would be a hill if we had soil behind the wall.)
Here’s a better shot that shows all the gravel behind the wall as well as the lean.
1 comment:
That looks great :) all your hard work paid off.
Post a Comment